Litter.Mapper allows you to record litter observations. Depending on your approach, you can either document every individual litter item, or take a more efficient route by recording a single observation for a litter type at a specific location and then specifying the item count as part of the observation details.
You decide how close or far apart observations of the same litter type should be. If Use GPS for observations is set to YES and location services are enabled on your mobile device, each observation will automatically be geotagged — allowing it to be visualized on maps.
At any time after recording, you can update the details of an observation. Data collected during a survey using Litter.Mapper can be uploaded to the server at https://kladia.info. There, you can review your records, identify items from uploaded photos, and export your data — all from within the Litter.Mapper web application.
The Counter panel includes a list of litter items that can be recorded. The composition of the list depends on the selection made in the Counting List Type field within the Survey Information section of the Info panel.
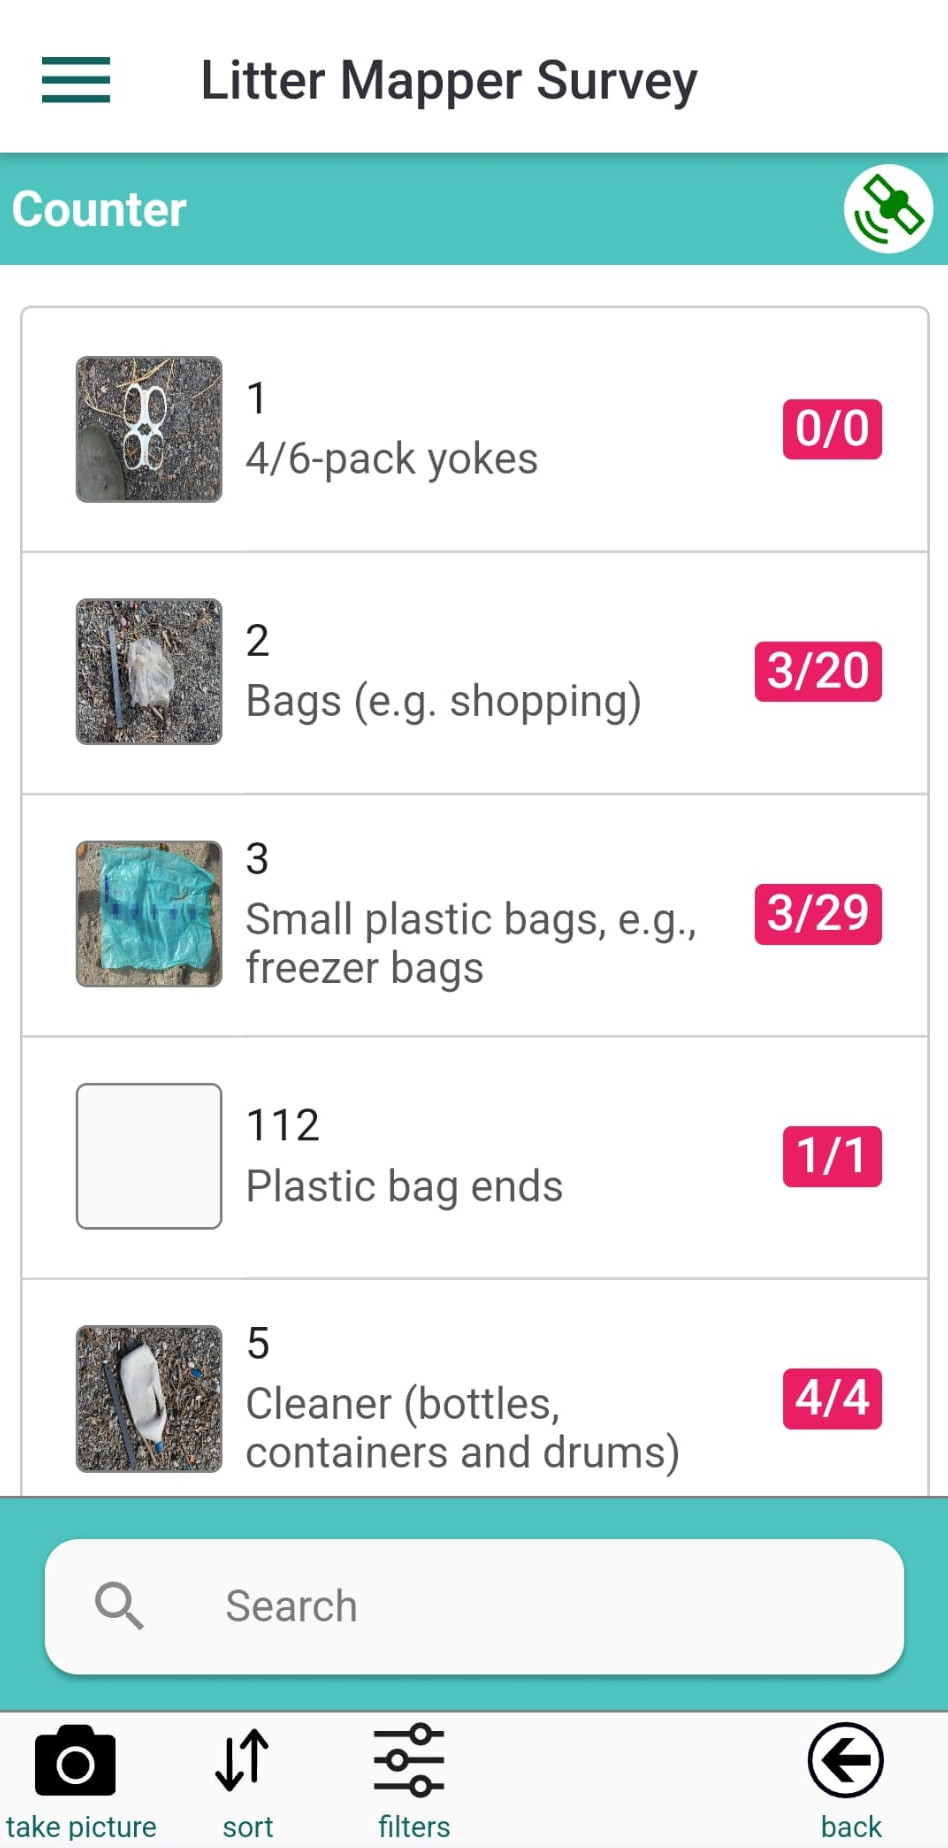
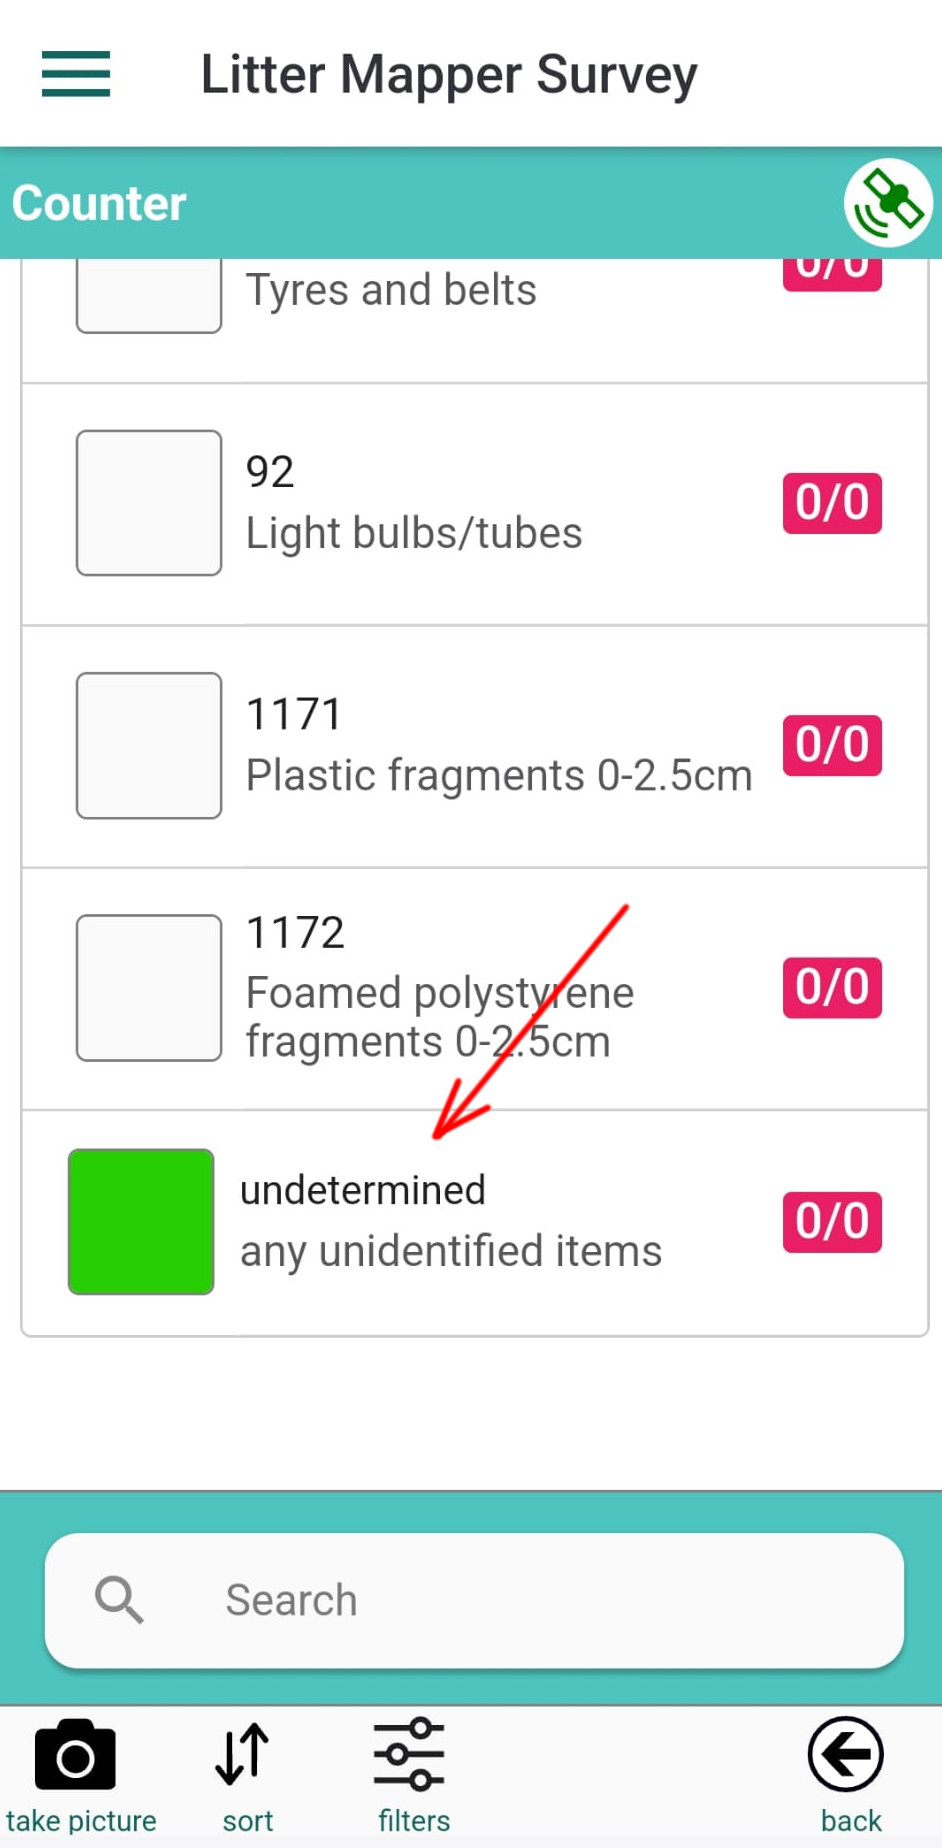
The last item in the counting list is labeled undetermined. This can be used to record observations that cannot be identified immediately, and may be classified later within the kladOS platform at https://kladia.info.
Each item in the counting list includes the following components:
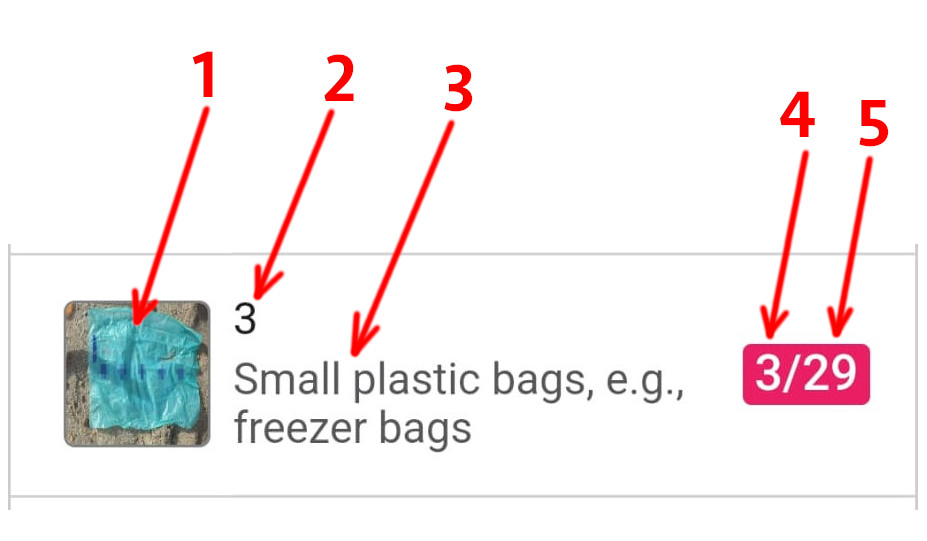
After tapping the name of a litter item, the red counter box will update: the total number of observations and the total count of individual litter pieces observed will both increase by one.
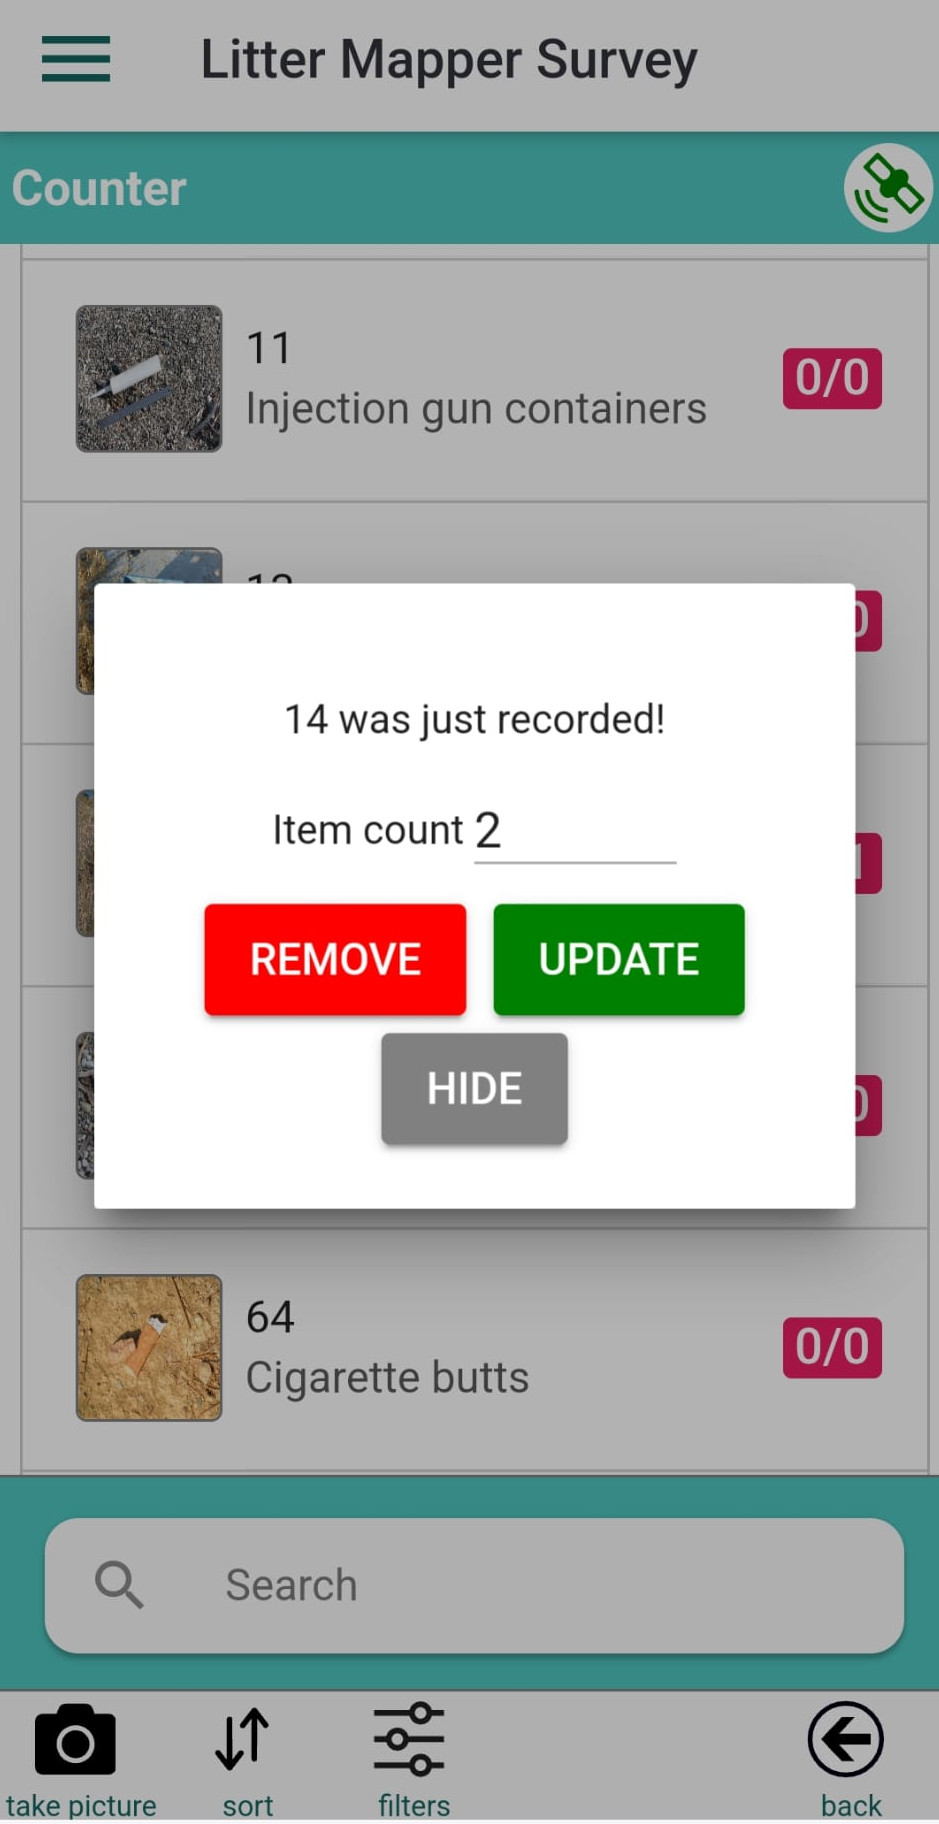
If the setting Show item count dialog after an observation is recorded (found in the Info panel) is set to YES, a dialog box will appear after each observation. This dialog includes a form where you can adjust the Item count — that is, the number of litter pieces included in that observation.
To change the count, enter the number in the Item count field and tap the green Update button. The total count of individual litter items in the red counter box will update accordingly. You can also tap the gray Hide button to close the dialog without making changes, or tap the Remove button to delete the current observation.
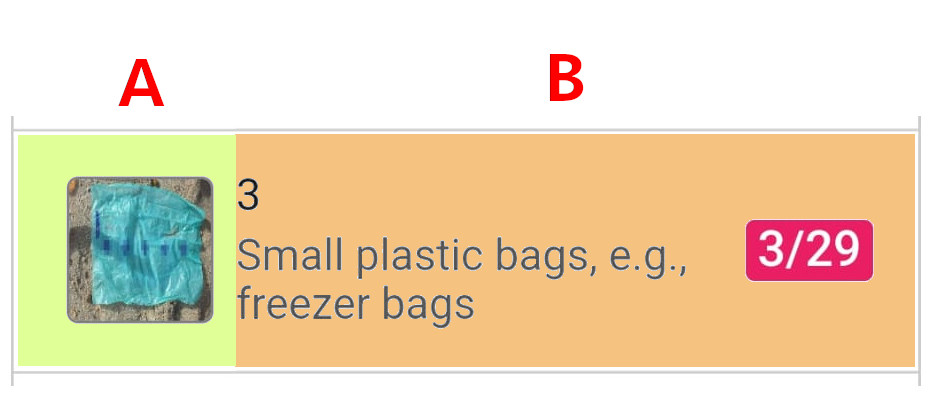
If the setting Show item count dialog after an observation is recorded is set to NO, tapping the litter item will still increase both observation count and item count by one — but no dialog will be shown.
To change the item count in this case, tap the icon in the A zone and open the Record list panel. Find the observation and tap it to open the Record details panel. You can change the item count there by editing the number in the field and tapping anywhere outside the field to confirm the change.
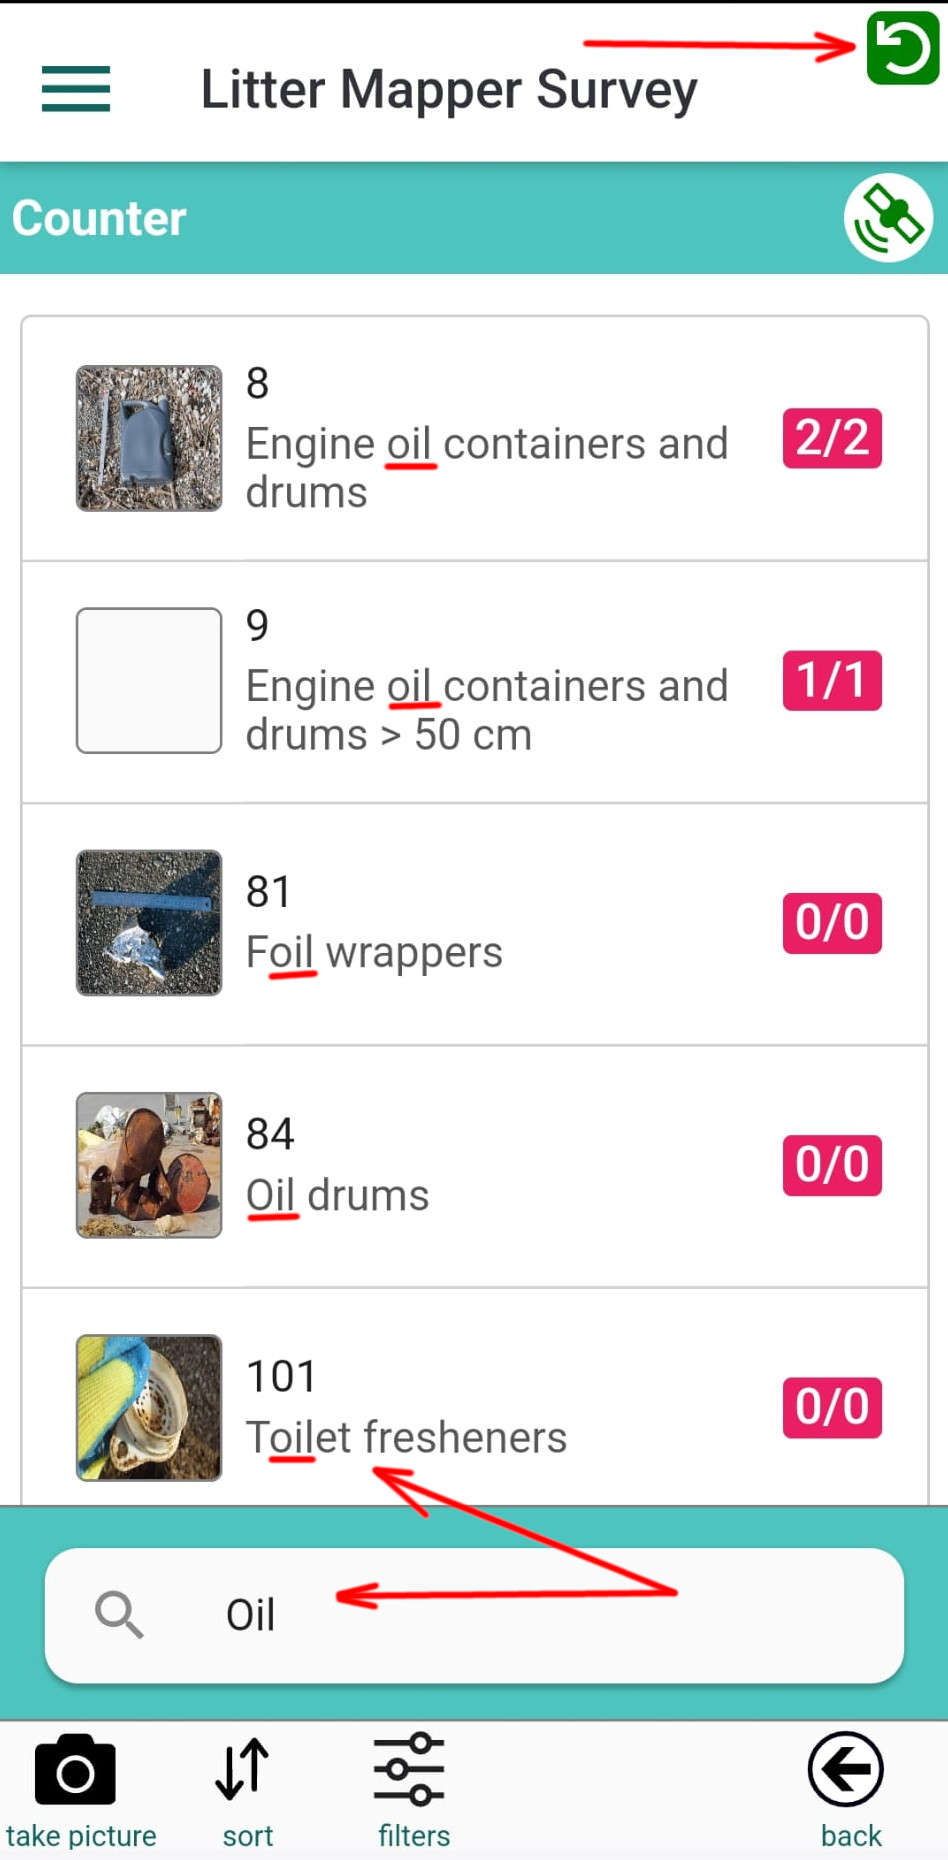
Searching: At any time, you can search for items in your counting list. Type a string in the search box, and the list will update to show items that contain that string. This is a “contains” type search — the result matches any part of the item name. If a filter or search is active, a green reload icon will appear at the top right of the screen. Tap this icon to clear all search and filter criteria.
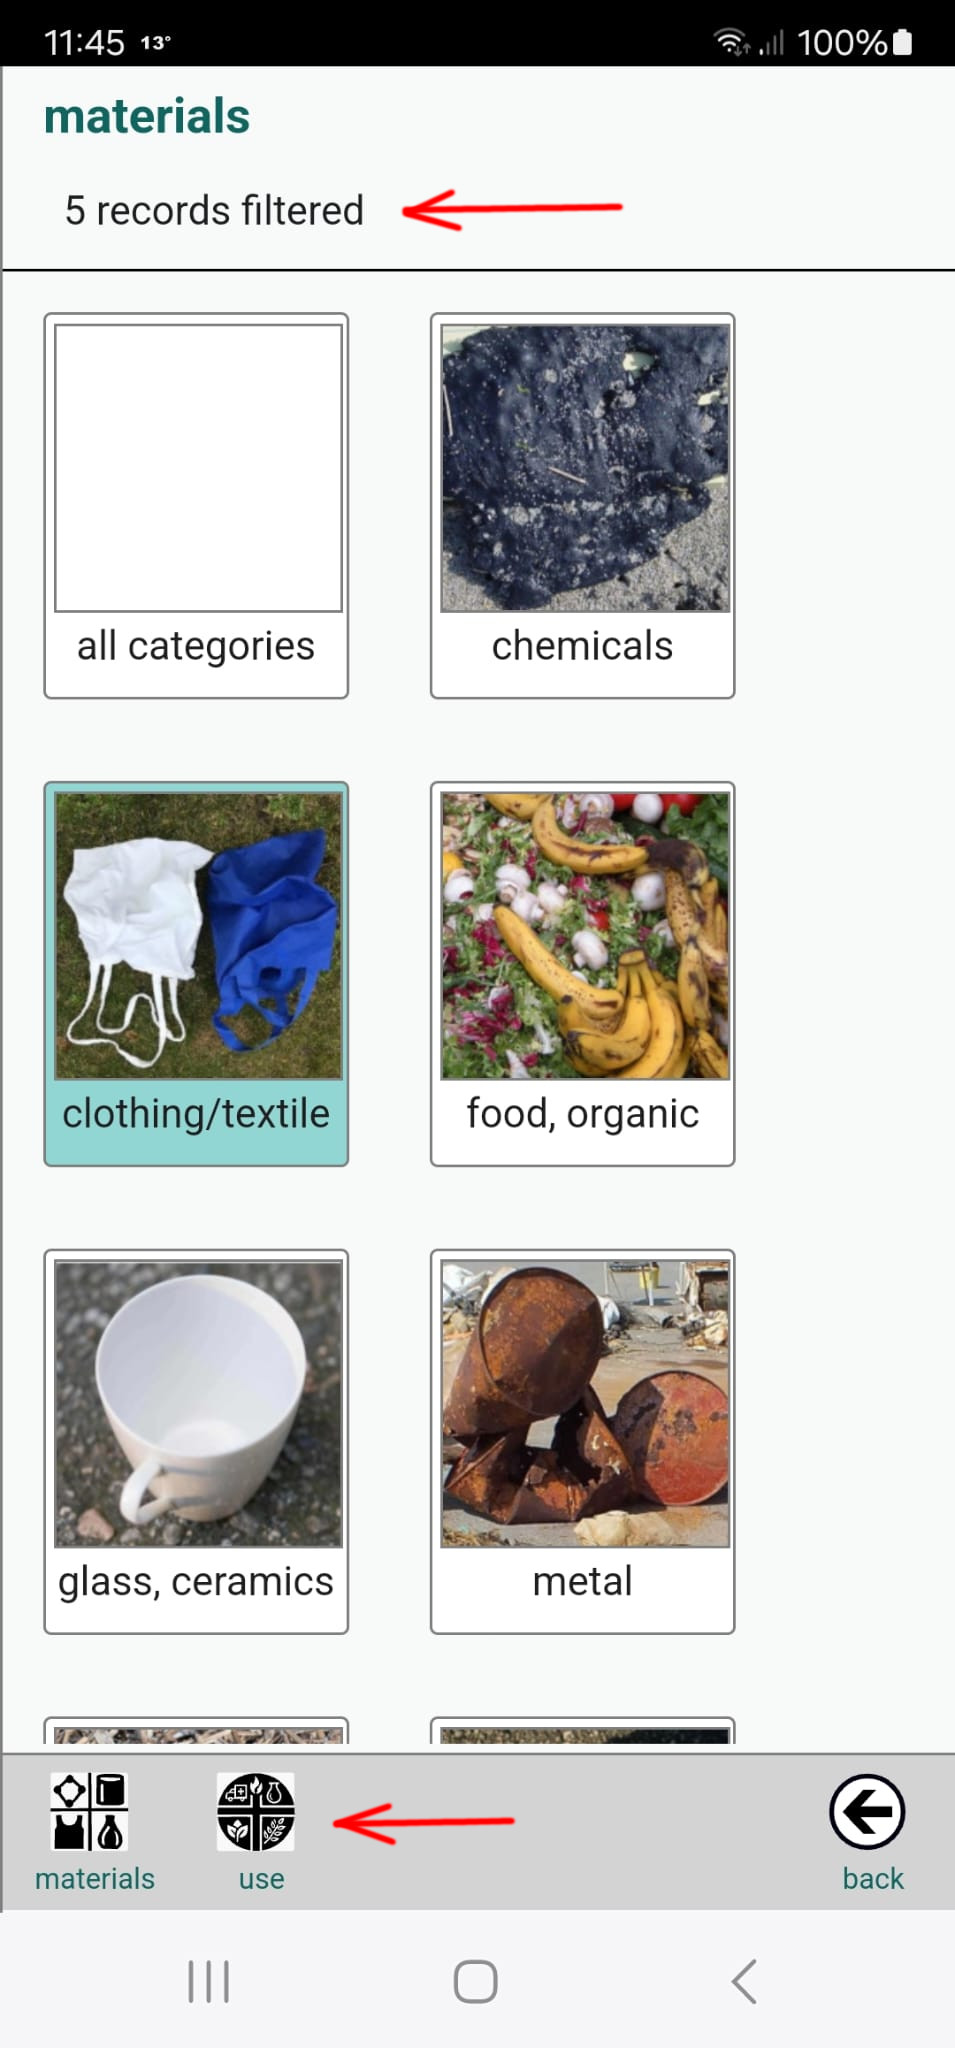
Filtering: Items in the counting list belong to two category types: Materials and Categories. To filter the list, tap the Filters button in the bottom toolbar, or swipe the screen from right to left. Then tap any category in the list to apply the filter. To reset the filter, tap all categories again to deselect them.
The default category type is Materials. You can switch between category types using the buttons in the bottom toolbar of the filter panel. Before returning to the counter, you can review the count summary displayed at the top of the filter panel.
To return to the counter panel, tap the Back button in the bottom toolbar of the filter panel or swipe the screen from left to right. If a filter is active, the green reload icon at the top right of the counter panel allows you to clear the filter without going back into the filter panel.
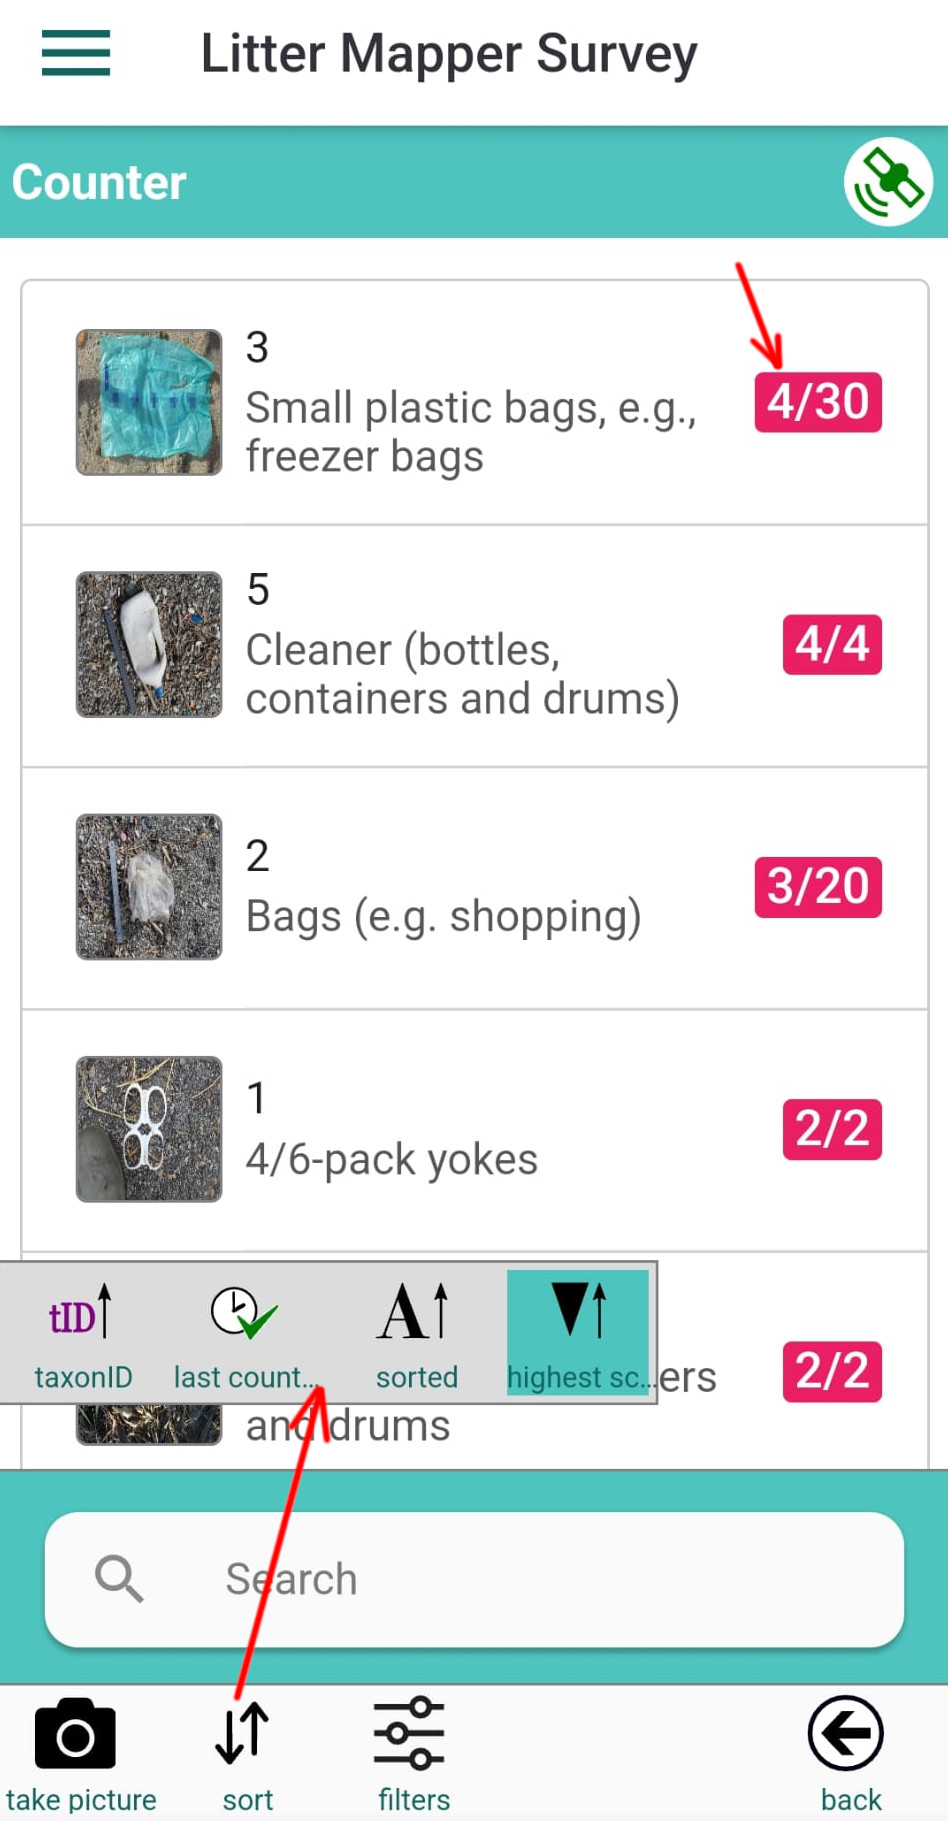
Sorting: Items in the counting list can be sorted using several criteria: by database ID, last counted, alphabetical order, or by the highest number of observations recorded. Tap the Sort button in the toolbar and select a sort type from the sort panel that appears above the search box.
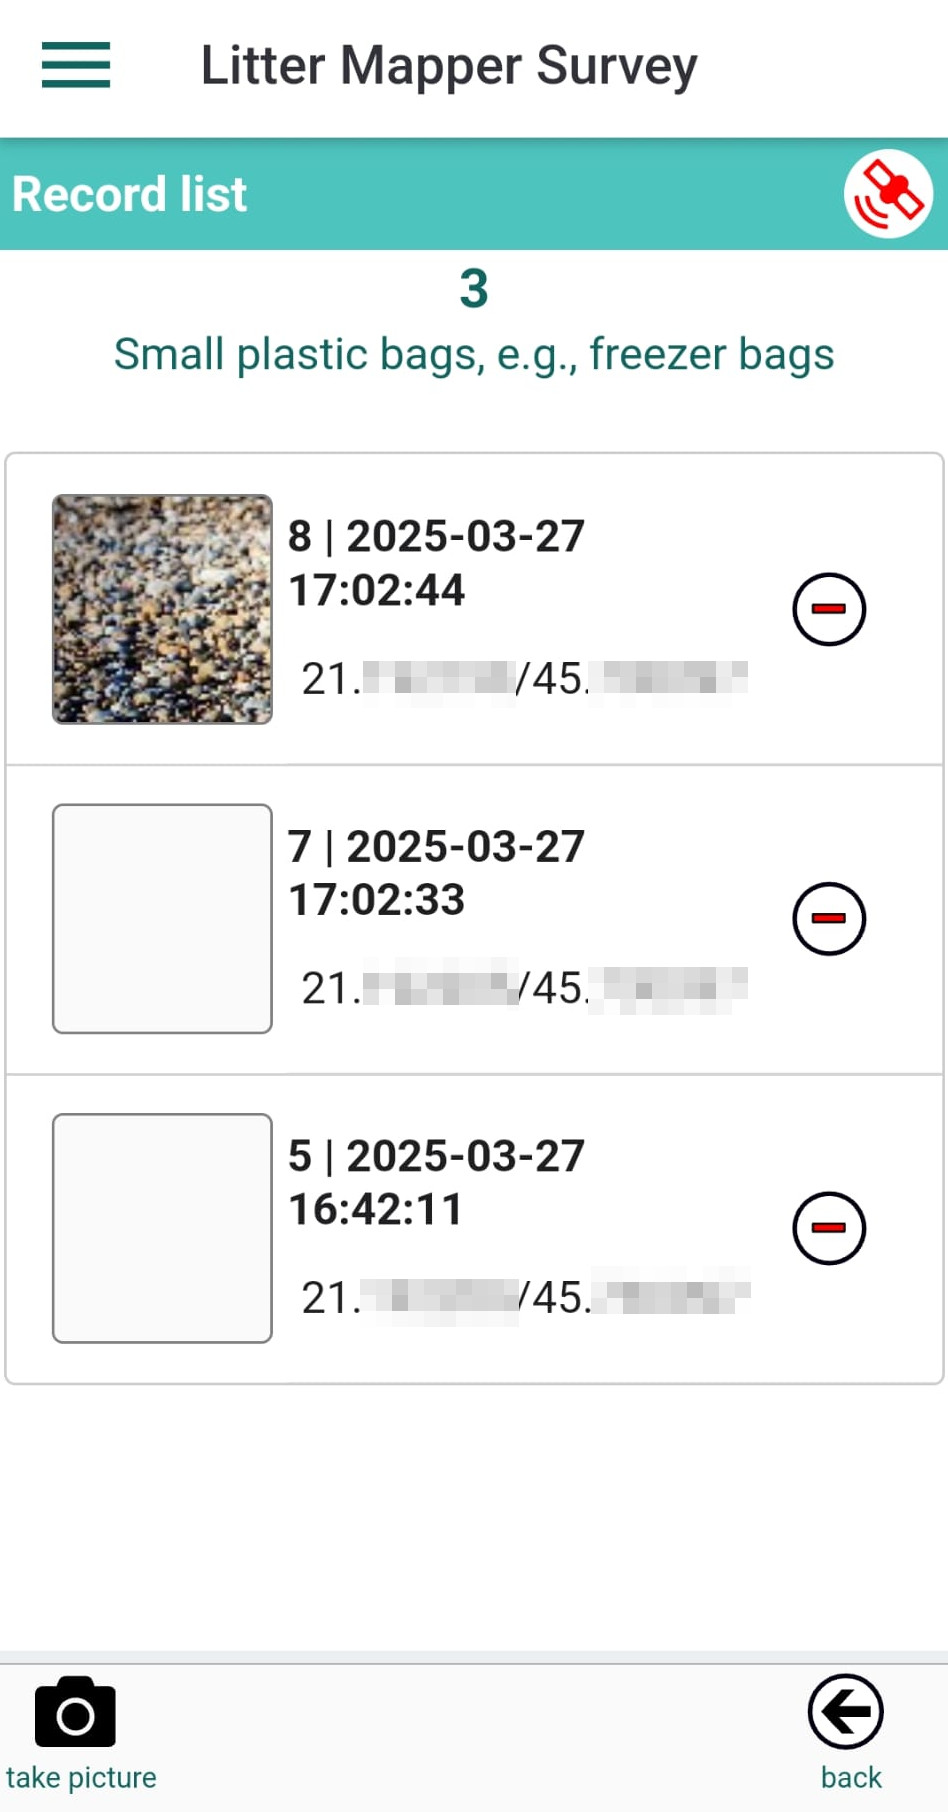
You can view the list of observations for an item by tapping its icon. Observations are ordered chronologically, with the most recent entry displayed at the top of the list.
Each row in the list shows the observation ID from the Litter.Mapper database, the date and time of the observation, and its geographical coordinates. If a photo is associated with the observation, it will appear as a thumbnail.
To take a photo for an observation, tap the image placeholder — this will open the camera. To view or edit the details of an observation, tap the text section of the row to open the Record Details panel.
You can also delete any observation from the list by tapping the red minus icon next to it.
To view sample images of the current counting item, swipe the screen from right to left.
You can return to the counter by tapping the back button on your Android device, or by tapping the Back icon located in the bottom toolbar of the panel.
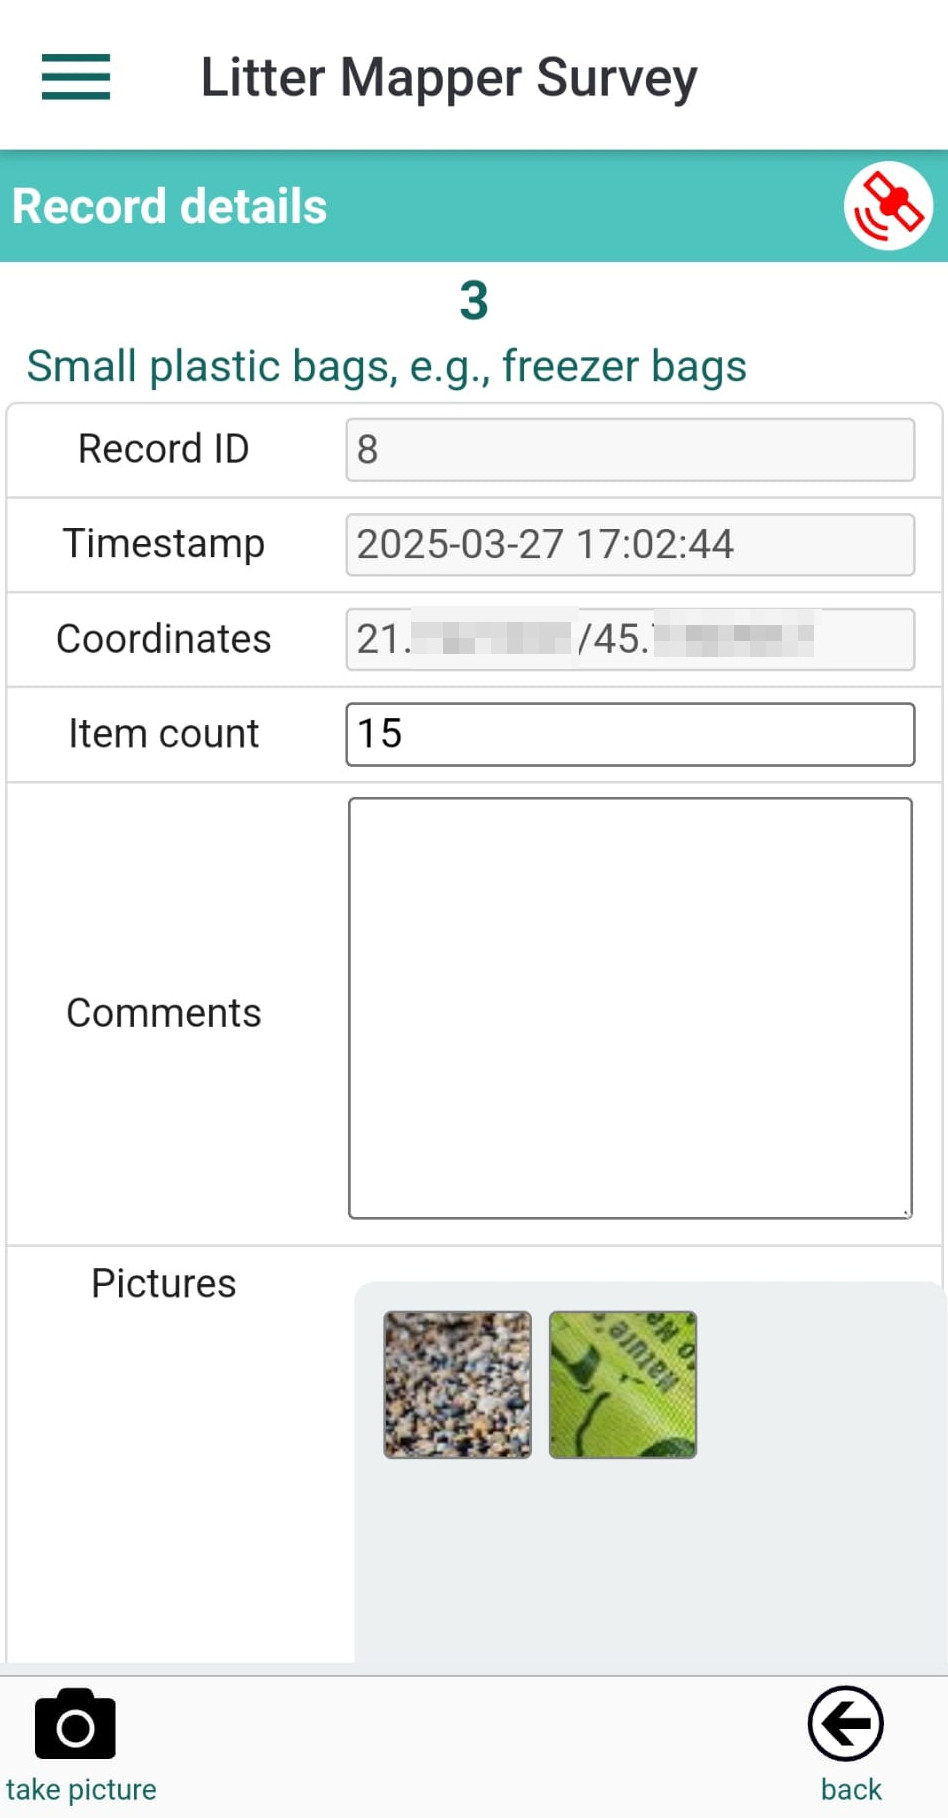
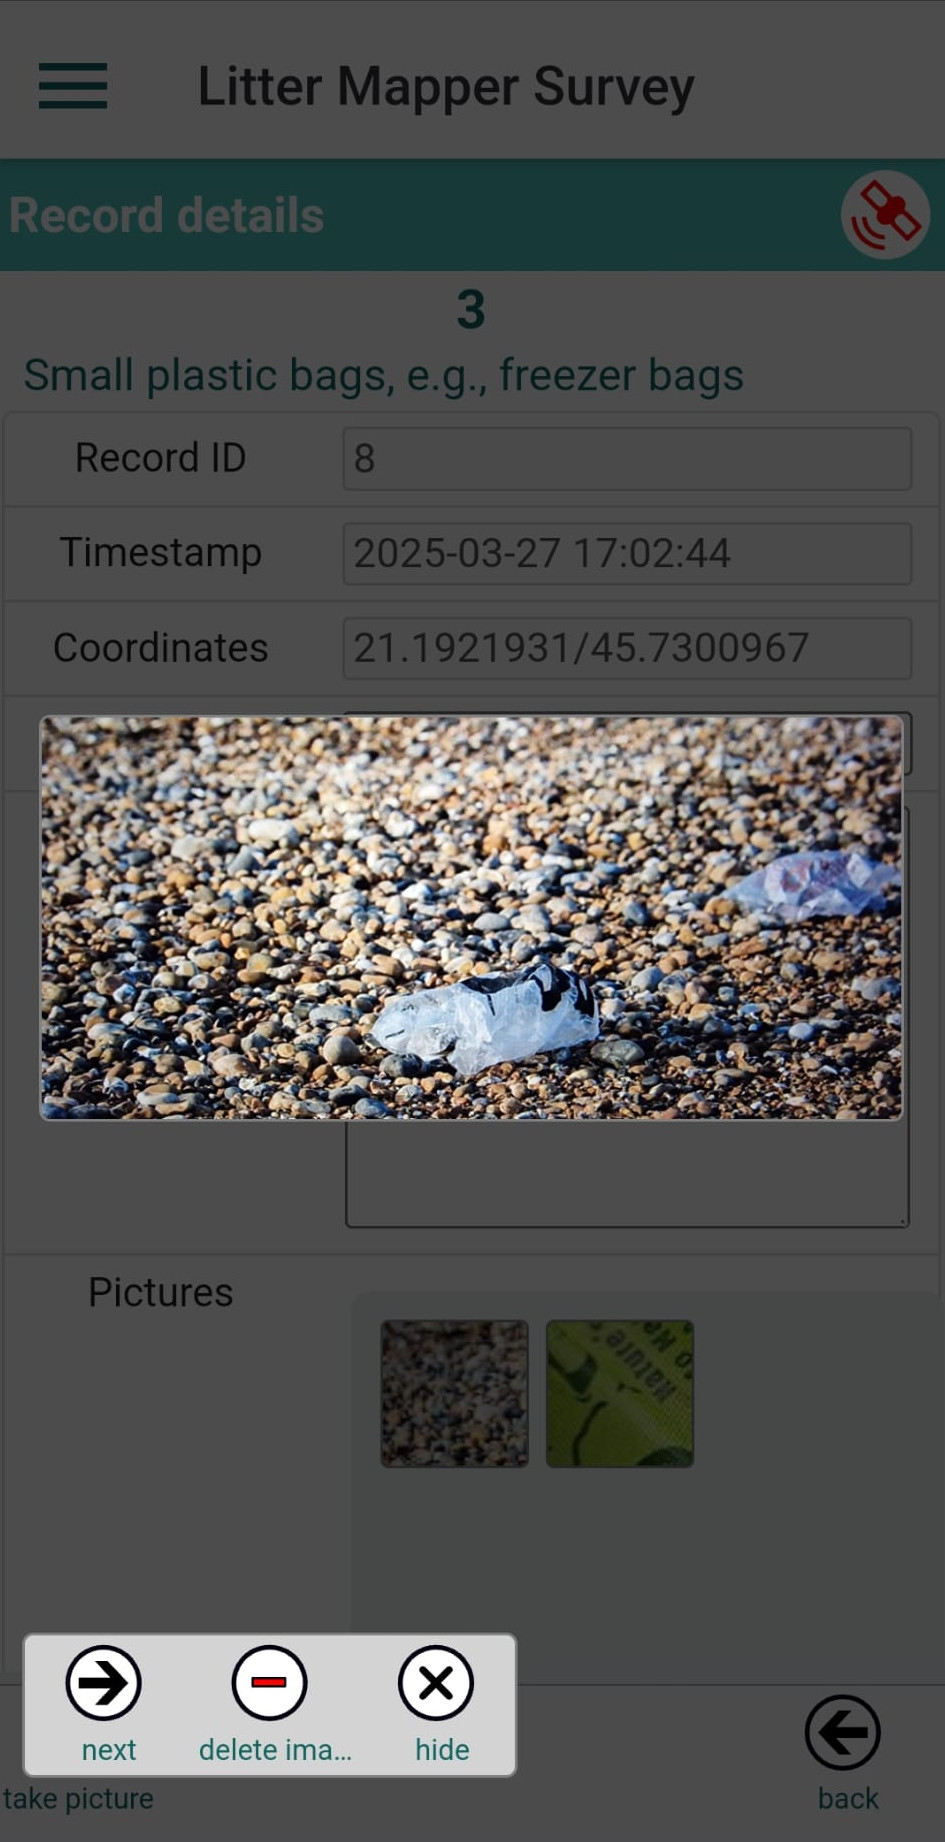
To view or edit the details of an observation, tap the text section of the row to open the Record Details panel. You can modify the Item Count and Comments fields, and add, inspect, or delete associated images.
You can return to the record list by tapping the back button on your Android device, or by tapping the Back icon located in the bottom toolbar of the panel.
Images can be taken using any button in the interface that displays a camera icon. However, the action triggered by the button depends on the panel in which it appears: